Making a Telegram Bot
I love bots that say weird stuff. From @horse_ebooks [1], to @dril_gpt2 [2], to @genderoftheday [3], there’s a lot of good ones. So, naturally, I got around to making my own. However, unlike the former two accounts, I didn’t have a wealth of source material to train (say) a GPT model on — and I wanted to have a bit more control over the output of my bot; something more in the style of @genderoftheday. For building a Telegram bot, and with the help of a couple NodeJS libraries, this turned out to be fairly simple.
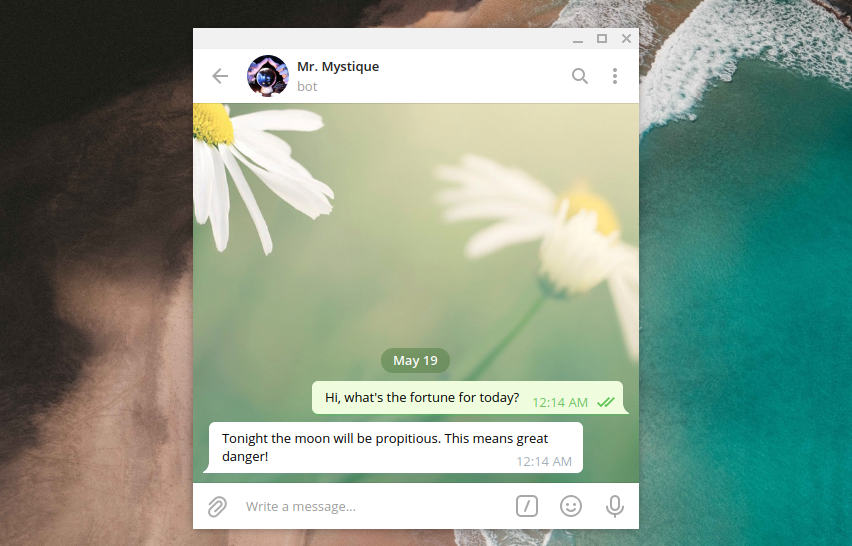
Here’s what we’ll be working on.
In this post I’ll guide you through setting up and building your own Telegram bot.
How Telegram Bots Work
Before we get into text generation, it’s worth talking a bit about how Telegram bots work.
First, you must register/create your bot with Telegram’s servers. The process for this is fairly unique: you do it by talking with Telegram’s own bot, the @BotFather [5] (a Godfather pun I’m not yet sure I love or hate). This process is fairly straightforward, and you should be able to navigate it just by talking with the bot and following the presented prompts. At this stage you can set up your bot’s username, name, profile picture, description and “about” section. Come back when you’re finished.
All set? Have you saved your BotFather-provided bot token? OK, now things get a little more tricky, because you can’t edit a bot’s behaviour directly on Telegram’s servers (where your newly created bot is now hosted). Instead, information flows as follows:
- Your bot gets a message, or more generally, something happens (a message is edited, someone joins a group it is in, etc.)
- Telegram’s servers send an HTTP message containing this information to some address you’ve previously set up (the endpoint, or web-hook)
- The server listening on that address receives and processes that information accordingly, and
- Using the bot token, sends an HTTP message back to Telegram’s servers asking for the bot to perform some appropriate reaction.
This means we need to set up an address to receive these events, and a server to do the processing and responding. For this, we’ll be using Amazon Web Services (AWS).
(In the very off-chance case you’re not yet familiar with AWS, it’s an umbrella name for the many web-related services Amazon offers. They have a generous free tier that should be more than enough to host your Telegram bot. The downside is you’ll have to provide a credit card number to access this tier; use a temporary and/or prepaid card for ease of mind. Also: try not to be alarmed by the look of the AWS dashboard — AWS puts a lot of things in your face at once, and we won’t be really using most of them.)
To keep the costs down, we don’t want our code (and servers) to run all the time; after all, we only need to do something whenever our web-hook is called upon from Telegram’s servers. So, instead, we’ll be using a serverless approach. Don’t be fooled by the name, there’s definitely still a server involved [6], it’s just that you don’t manage it, and (as far as you care) it’s only running when your code is running — upon some event (which we’ll want to be the web-hook getting a message), some magic wake-up-the-server setup happens, your code is ran, and the server shuts off again. This means you only pay for the time your code is actually doing something.
We’ll also need an actual HTTP interface to bridge our serverless code with the incoming HTTP request.
[6] definitely still a server involved
For the serverless code, we’ll use AWS’s Lambda [7], and for the HTTP interface, we’ll use API Gateway [8].
Actually Getting Started
At this point, it gets easier to explain stuff as we go.
We’ll code our bot using NodeJS [9], so we’ll start by initializing a new project. Create a new my_bot directory, and (in that directory) initialize a new project with
npm init # Follow the prompt to setup the details of your bot
(You’ll need to install NodeJS and npm if you don’t have them already.) [10]
[10] NodeJS/npm installation guide
Now, instead of dealing with AWS’s dashboard, we can automate the setup and deployment of our code using the npm package serverless [11] (which has a very confusing name. I’ll refer to it as “npm-serverless” to avoid confusion).
We can install that with
npm install --global serverless
and use serverless (or sls) to call upon the npm-serverless command line interface. You’ll need to set it up with your AWS account:
sls config credentials --provider aws --key <key> --secret <secret>
(You can get the necessary key and secret in the “My Security Credentials” page of your AWS Dashboard, under the “Access Key” tab. [12])
[12] “My Security Credentials” page of your AWS Dashboard, under the “Access Key” tab.
Now, let’s initialize npm-serverless in our project…
sls create --template aws-nodejs
… where we’ve specified we’ll be using AWS (and that it’s a NodeJS project). You should now have a serverless.yml YAML [13] file in your project directory. Opening it up, you’ll find that a lot of boilerplate has been created for you, most of it commented out. We’re only interested in some of the fields, so erase and/or modify the commented content until it looks like the following (I’ve added some comments myself):
service: mybot
frameworkVersion: '2' # If this looks different, leave it as is!
provider:
    name: aws
    runtime: nodejs12.x # Also leave as is
    lambdaHashingVersion: 20201221 # And also leave as is
functions:
    telegram:  # Previously "hello"
        handler: handler.webhook  # Previously handler.hello
        events:
            - http:
                path: webhook
                method: post
                cors: true
Under the functions field, we’ve specified that we’ll have a serverless Lambda service called telegram; specifically, we’re saying that when it’s called, the function webhook of the file handler.js should be ran. events specifies we’ll have an HTTP endpoint associated to this function; it’ll accept POST messages [14] at <url of our endpoint>/webhook.
Let’s write the code to be ran. Open up handler.js (which npm-serverless should have created for you), and let’s simplify the generated boilerplate code:
async function webhook(event) {
  // Called when our web-hook receives a message
  // The function receives an `event` argument, which contains the
  //  incoming HTTP message information.
  // We'll do nothing for now.
  return {statusCode: 200};
}

module.exports = {webhook};
(Note how we’re exporting the function to be called. [15])
Returning an HTTP 200 status code [16] will let the Telegram server (or whoever hit the endpoint) know we received their message alright and have done whatever processing we need to do.
(If you fail to perform this acknowledgment, Telegram will keep re-sending the events for a while, which can result in unexpected repeated calls to your function and more server time, so make sure to return an OK status code.)
We can now deploy (upload to the cloud) our service; npm-serverless will take care of setting up Lambda and API-Gateway for us:
sls deploy
If everything was set up correctly, after a little while you should get a message confirming that the service was deployed and related details. Of these, we’ll need the endpoint address, listed as POST - <link>, so we can point the Telegram servers to that address.
Serverless: Packaging service...

...

Service Information
service: mybot
stage: dev
stack: mybot-dev
resources: 12
api keys:
 None
endpoints:
 POST - https://<...link...>/dev/webhook
functions:
 telegram: mybot-dev-telegram
layers:
 None
Configuring the bot’s endpoint is done the same way as making it perform any other action: by sending an HTTP POST message to the address [17] https://api.telegram.org/bot<TOKEN>/<SERVICE>, where you should replace <TOKEN> by your BotFather-provided token (notice the leading “bot”), and <SERVICE> according to what you want to do. (To set the endpoint, that’s setWebhook.)
You can do this with curl if you’re on Linux (handy one-liner below*), but in the spirit of making things clear and cross-platform, we can quickly write some Javascript to do it.
curl --request POST --url https://api.telegram.org/bot<TOKEN>/setWebhook --header 'content-type: application/json' --data '{"url": "<ENDPOINT URL>", "allowed_updates": ["message"], "drop_pending_updates": true}'
To make an HTTP request from NodeJS we’ll bring in bent [18], a very nice lightweight requests library:
npm install bent
And now we can create setWebhook.js …
// Import bent
const bent = require('bent');

// Load our Telegram bot key and AWS endpoint URL from the environment variables.
// You could write them out explicitly (as strings) here, but that's dangerous!
// This way, there's no problem if your code ever becomes public
// (for example, you host it on a Github repository).
// Otherwise, this would leak your keys, and allow anyone to control your bot.
const TELEGRAM_KEY = process.env.TELEGRAM_KEY;
const ENDPOINT_URL = process.env.ENDPOINT_URL;

// Create a callable object that will POST JSON to the bot URL, and expect a
// 200 OK status code.
const poster = bent(`https://api.telegram.org/bot${TELEGRAM_KEY}/`, 'POST', 'json', 200);

// The message we will be POSTing to the URL; the field names should speak for themselves,
// but you can find their description, as well as other allowed fields at
//    https://core.telegram.org/bots/api#setwebhook
const post_message = {
  "url": ENDPOINT_URL,
  "allowed_updates": ["message"],
  "drop_pending_updates": true,
};

// bent is asynchronous, so we wrap it in an async function
async function setIt() {
    const response = await poster('setWebhook', post_message);

    // Let's log the response, just to get some visual feedback.
    console.log(response);
}

// Run the asynchronous code.
setIt();
… and run it.
TELEGRAM_KEY='<your bot key>' ENDPOINT_URL='<your endpoint url>' node setWebhook.js
You should get a response confirming your web-hook was successfully set.
{ ok: true, result: true, description: 'Webhook was set' }
Note: By default, setWebhook.js will be packaged and uploaded to S3 (AWS’s storage service) alongside the rest of the code as part of your serverless setup. This isn’t a big problem, but it’s not really needed. If you want to keep things tidy and save some cloud space, you can exclude setWebhook.js from your serverless service by adding
package:
   patterns:
       - '!setWebhook.js'
to your serverless.yml file.
Reading and Sending Messages
Your code is now ran every time your bot gets a message, but it’s not doing anything! Thankfully, the process for making the bot reply is very similar for what we did above to set the web-hook. (If you used that curl one-liner, you might want to go back a couple paragraphs.)
First, let’s go back to handler.js and parse the incoming messages into something we can process. If we refer to the Telegram bot API documentation [19], we’ll find that for message events, the body of the HTTP request will contain a message field, itself an object with more information about the message [20]. (We’ve set up our web-hook to only receive message events, so we don’t need to worry about other events.)
async function webhook(event) {
  // Parse the body of the incoming POST message as JSON
  const body = JSON.parse(event.body);

  // Get the `message` field of the incoming update. Because
  // we've only subscribed to message events, we are guaranteed
  // that the body will always have this field.
  const message_object = body.message;

  // From Telegram's API docs* we can find that the `text` field
  // will always be present, and contain the text of the incoming
  // message.
  //    * https://core.telegram.org/bots/api#message
  const text = message_object.text;

  // TODO: We want the bot to echo this message, but how?

  return {statusCode: 200};
}

module.exports = {webhook};
Now all we’re missing is some code to make the bot reply. Telegram’s bot API docs [21] tell us the endpoint for doing this is sendMessage, i.e., we want to send a POST message to https://api.telegram.org/bot<TOKEN>/sendMessage.
[19] Telegram bot API documentation
[20] itself an object with more information about the message
Let’s once again use bent for that (npm install bent if you haven’t already):
const bent = require('bent');

// We set up a function to POST to the Telegram API the same way
// as before; we'll use the `telegram` function to send POST requests
// to various endpoints.
const TELEGRAM_KEY = process.env.TELEGRAM_KEY;
const telegram = bent(`https://api.telegram.org/bot${TELEGRAM_KEY}/`, 'POST', 'json', 200);

// We make the bot send a message by POSTing a well-formed object
// to the `sendMessage` endpoint of the bot API. This object must
// always contain a `chat_id`, indicating where the message goes,
// and a `text` string field, which is the actual content of the
// message.
// Let's wrap all of this in a function.
async function sendBotMessage(chat_id, text) {
  const options = {chat_id: chat_id, text: text};
  return telegram('sendMessage', options);
}

async function webhook(event) {
  const body = JSON.parse(event.body);
  const message_object = body.message;
  const text = message_object.text;

  // Echoing the incoming message is now easy, but we'll
  // need to get the correct `chat_id`:
  const chat_id = message_object.chat.id;

  // Send it back!
  await sendBotMessage(chat_id, text);

  return {statusCode: 200};
}

module.exports = {webhook};
You’ll notice that we need a chat_id to indicate where we’re sending our message to; because we want to reply to the incoming message, we grab that identifier from message_object.chat.id.
Before we upload this to the cloud (and bask in glorious bot echoage), there’s something we need to fix: we’re once again grabbing the Telegram bot key from the environment variables, so that sharing the code doesn’t mean sharing access to the bot, but now this will be running in the cloud, so we can’t just set our variables in the command line.
There are two solutions to this:
- Set the environment variables manually in the AWS Lambda dashboard;
- Let npm-serverless set it up.
We’ll be going with number 2, because it’s easier and makes your project more self-contained (as in, sls deploy sets everything up in one go). (If you really want to use the AWS Lambda dashboard, and/or want to confirm that variables were set, look under the “Configuration > Environment variables” tab.)
In serverless.yml, under the provider field, we can add an environment entry. Any sub-entries (of the form name: value) will be set up as environment variables by npm-serverless.
But! adding an entry with the token to serverless.yml defeats the purpose of grabbing the token from the environment variables in the first place! If we want to share our bot setup, we’ll have to share serverless.yml as well.
The solution to this is creating another YAML file (which we’ll never share with anyone) containing these secret values.
Then we can load those into our serverless.yml with ${file} [22]:
...
provider:
   ...
   environment:
       TELEGRAM_KEY: ${file(./secrets.yml):TELEGRAM_KEY}
That should do it! Run sls deploy to deploy your new setup, and message your bot on Telegram. It should reply with whatever you just sent it!
(If you’re using source control (e.g. git) for your project, now is a good time to add secrets.yml to your.gitignore file [23].)
C’mon, Do Something
Of course… That’s not very interesting. We want our bot to say things!
To do that, we need to decide what sort of things it should say. ygg is a small piece of software [24] I’ve written to deal with this problem. It turns a description of what sort of sentences should be generated into a Javascript file that generates those sentences.
You can install ygg with
npm install --global @miguelmurca/ygg
Now we need to describe our valid sentences. You can find a description of the syntax on ygg‘s page [25], but the core idea is we’re composing blocks that all reduce down to a sentence. ygg will try to give you helpful information if you get anything wrong, so don’t be afraid to experiment!
For our current purposes, I’ve written a small grammar that will produce horoscope-like messages. Create a new file, grammar.ygg with the following:
(
 |("Today" "Tonight" "Tomorrow" "Soon")
 " "
 |(
   ("the " |("moon" "sun" "stars" "Earth" ))
   |("Mercury" "Pluto" "Venus" "Mars")
  )
 " will be "
 |("retrograde" "shining brightly" "in their house" "propitious")
 "."
 ?(" This means " |("good things" "great danger") "!")
)
Now we can compile this into something we can use in our handler.js file by calling ygg :
ygg grammar.ygg grammar.js
This should produce a new file, grammar.js, which exports a function, generate, that we can call from our handler.js file to get a response for our bot:
const bent = require('bent');

// Let's require the newly created `grammar.js` file;
// Note the ./ !
const grammar = require('./grammar');

const TELEGRAM_KEY = process.env.TELEGRAM_KEY;
const telegram = bent(`https://api.telegram.org/bot${TELEGRAM_KEY}/`, 'POST', 'json', 200);

async function sendBotMessage(chat_id, text) {
  const options = {chat_id: chat_id, text: text};
  return telegram('sendMessage', options);
}

async function webhook(event) {
  const body = JSON.parse(event.body);
  const message_object = body.message;
  const text = message_object.text;
  const chat_id = message_object.chat.id;

  // We generate a valid response via the `generate`
  // function in our `grammar.js` file; notice that
  // we pass in the input! This will allow you to
  // change the generated answers depending on input
  // patterns. See `ygg`'s documentation for more
  // information on this (the `&` pattern).
  const response = grammar.generate(text);

  // Now we send the response back!
  await sendBotMessage(chat_id, response);

  return {statusCode: 200};
}

module.exports = {webhook};
That’s it! All that’s left to do is upload our updated code to the cloud; but before that, and like before, you can exclude grammar.ygg from the files to be uploaded, as it’s not needed there:
package:
   patterns:
       - '!setWebhook.js'
       - '!grammar.ygg'
And so finally:
sls deploy
Success! You should be the proud owner of a bot that says weird stuff! Try messaging your bot, and see if it replies with a sentence from your grammar.
Conclusion
If you got this far, congratulations! You are now ready to look at Telegram’s Bot API page [26] and venture on in making more sophisticated Telegram bots, or maybe try your hand at making a Twitter bot?
Before you go, I’d like to give you a final tip; as you might have noticed, sls deploy can take quite a bit to run. This is because this command triggers an update of your whole Lambda service. If all you’ve done is changed source code, you can speed up the update processing by signaling npm-serverless that that’s the case, with
sls deploy function --function telegram
(or whatever function name you have defined in your serverless.yml)
And that’s really it! Best of luck in your future bot endeavours.
If you enjoyed this post, consider:
checking out my Github profile, or
By Miguel M. on May 18, 2021.
/gemlog/